Contents
Multiple Schools. Performing The Calculations
Creating A Project
The following process outlines how to create new project in a Broadband Calculation Tool: Schools. This program has eight different tabs, that are organized as a series of questions that provide for main user inputs. This section gives you step-by-step instructions for adding or revising data under each of the tabs.
Exploring the tabs of a Broadband Calculation Tool: Schools. Under each tab, the application presents one or more worksheets. Position the mouse pointer inside a worksheet cell, and click the mouse button to select this cell. If the cell is editable, you can then enter or change its value, for providing correct calculations for your project.
Step 1. Navigate to the Account tab on the main menu and select "Create New Project" in the center of Home page (Figure 1).
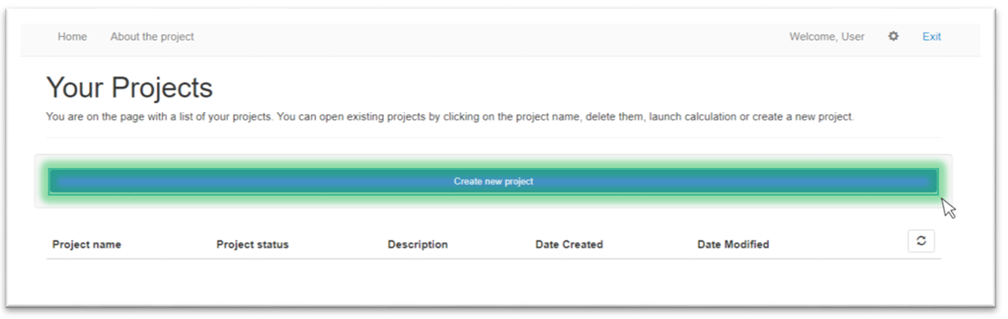
Figure 1. "Create Project" button
If you have already created a project you can create the new one with duplicate button Duplicating A Project .
Project Name And Description
As soon as you log in to the system User Authentication and click on Creating A Project button you will be redirected to a new project page where you can submit some details about the new project. Project Name and Description tab displays following components that should be fulfilled: country name, project name and description of your project (Figure 1).
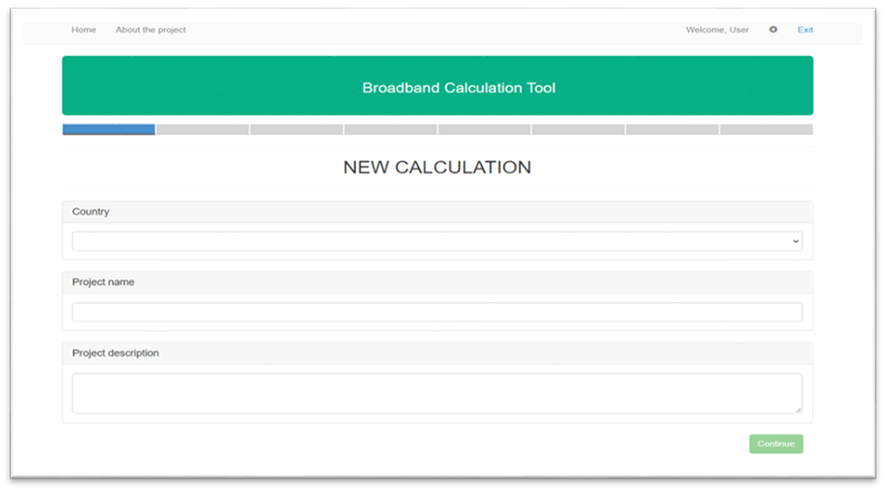
Figure 1. Project Name and Description tab
Step 1. Use the drop-down list to choose the country where your object located (Figure 2).
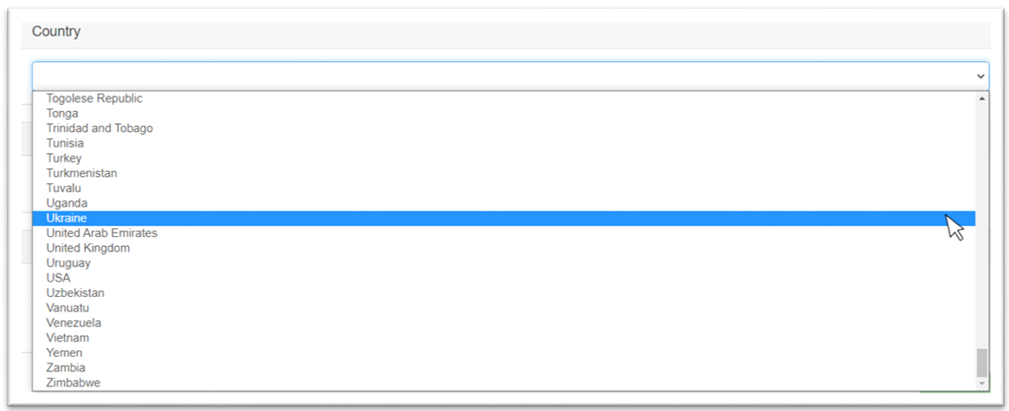
Figure 2. Drop-down list for selecting a country
Step 2. Input your project name (Figure 3).

Figure 3. Project name field
Step 3. Input your project description that will allow you to indentificate your project in system (Figure 4).

Figure 4. Project description field
Step 4. Press "Continue" in the bottom of the "Project Name and Description" window to go to the next tab (Figure 5).
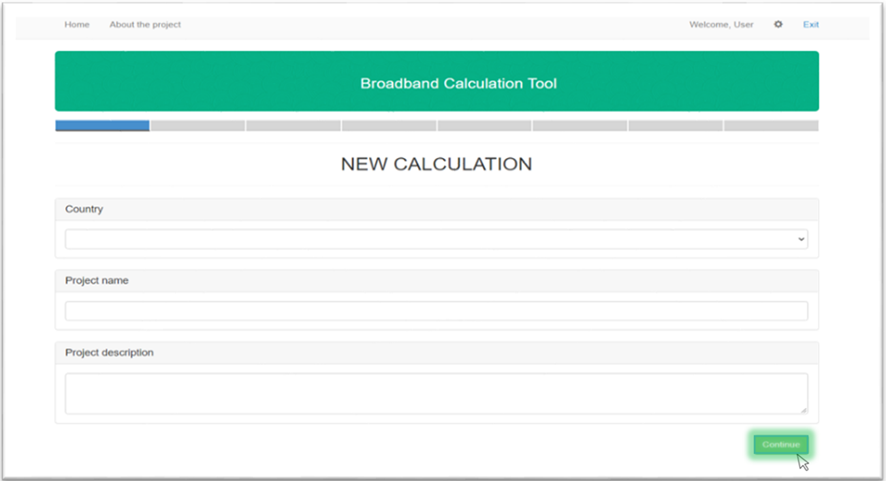
Figure 5. Project description field. "Continue" button
After this actions it will redirect you to the Broadband Connection Calculation tab.
Broadband Connection Calculation
After you input initial information about your project in previous tab Project Name And Description in Project Name and Description part you'll go to "Broadband connection calculation" tab.
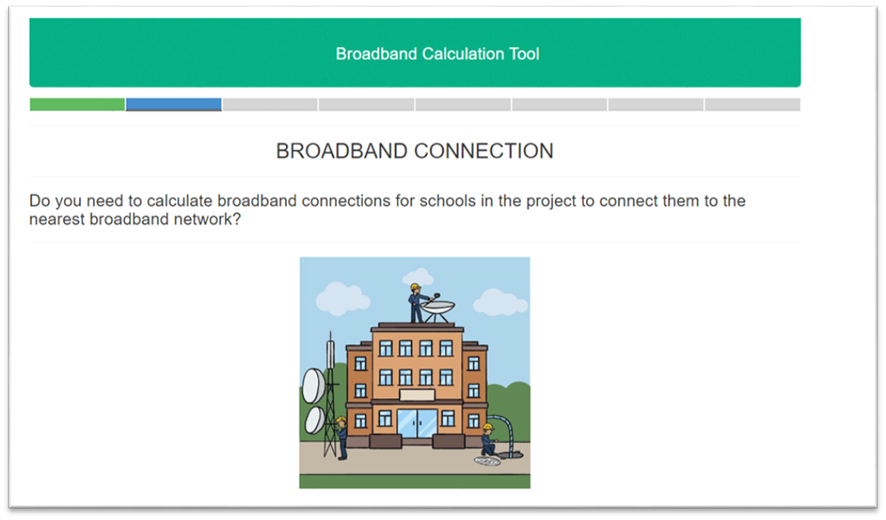
Figure 1. Broadband connection tab
This tab offers you different options for broadband connection calculation. You can select one of 3 possible options:
By selecting "Calculation only broadband connection of schools to the nearest network points of presence (PoP)" in the project it will be considered next positions: evaluation of broadband connection deployment and operation costs, estimation rates of return and selection of select suitable connection technologies (Figure 2). After selection of this option you'll go to tab Calculation Of Required Bandwidth
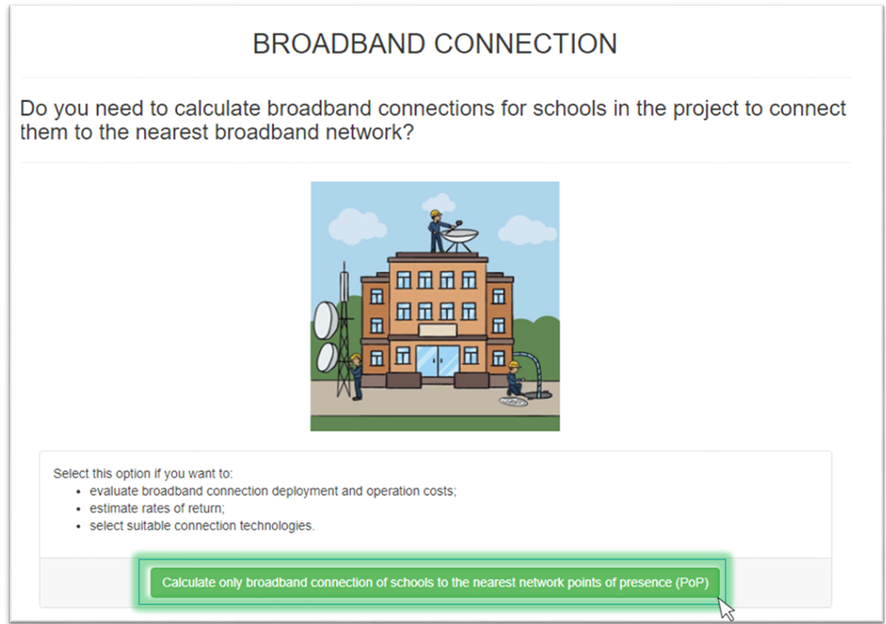
Figure 2. First option
By selecting "Calculation only broadband connection of schools to the nearest PoP with broadband connections between schools" it will be considered next positions: evaluation of broadband connection deployment and operation costs, estimation rates of return and selection of select suitable connection technologies and with calculation of an optimal (from the economic point of view) network structure where all schools are represented as interconnected network nodes. Also in this option you should select one of the following criteria that will meet your needs:
Cost of ownership - select this option if you would like us to use cost of ownership as a criterion to choose the best broadband connection options
Net present value - select this option if you would like us to use net present value as a criterion to choose the best broadband connection options (Figure 3). After selection of this option you'll go to tab Calculation Of Required Bandwidth .
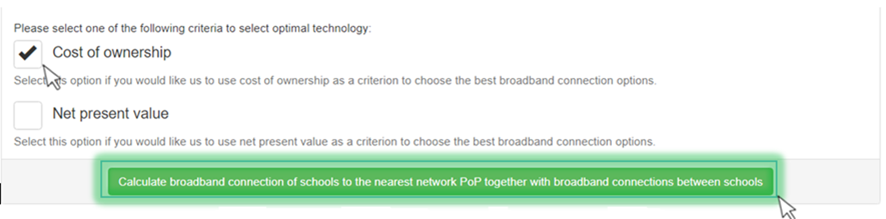
Figure 3. Broadband connection second option
By selecting "Skip Broadband connection calculation" you have an opportunity to skip all the forms, that are used for broadband connection calculations. After that you'll go straight to "Local area network" tab (Figure 4).
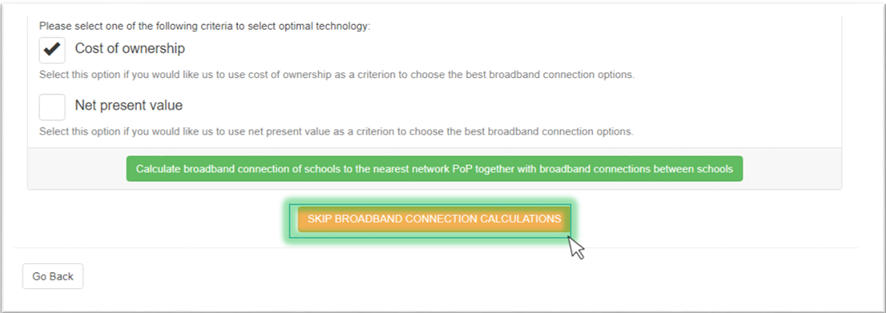
Figure 4. Broadband connection "Skip" option
If you want to change parameters on previous tab select "Go back" button. After that you'll go back to Project Name And Description tab.
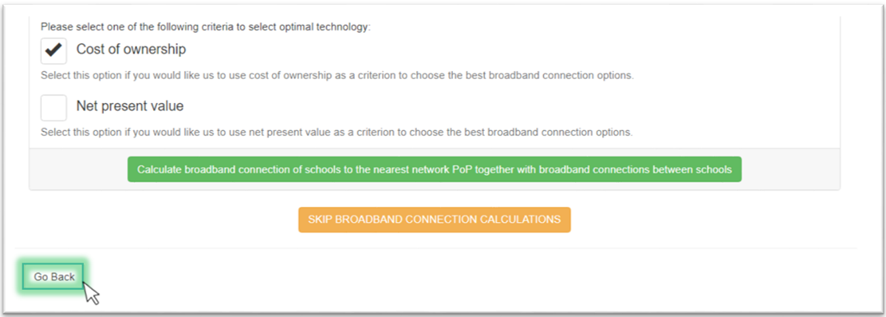
Figure 4. "Go back" button
Calculation Of Required Bandwidth
After selecting one of broadband connection calculation options Broadband Connection Calculation, the calculation of required bandwidth page opens. Now you can just choose one of the given options which helps you to find out required bandwidth for your project.
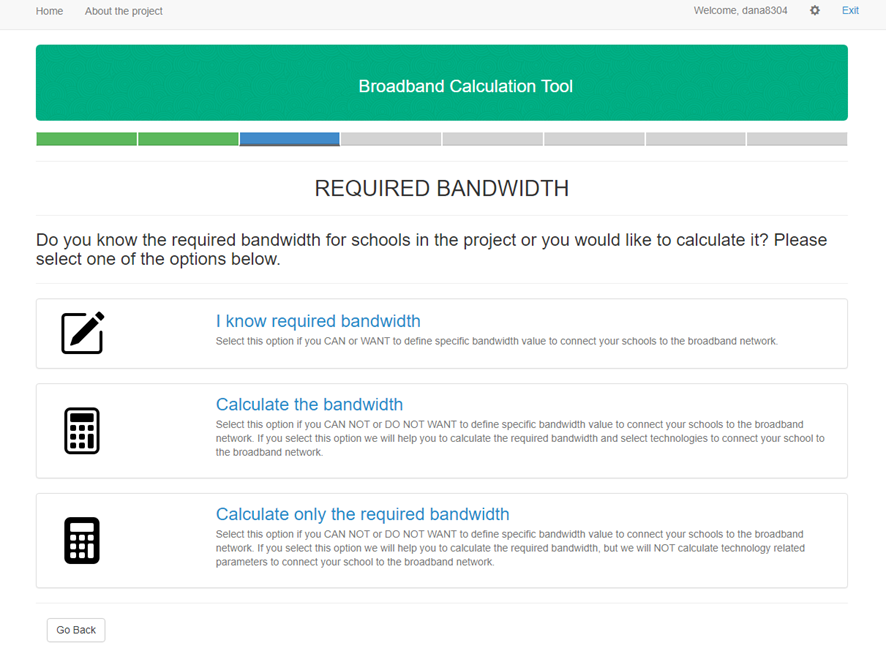
Figure 1. Required bandwidth tab
If you want to define specific bandwidth value to connect your schools to the broadband network yourself select first option "I know required bandwidth" button (Figure 2). After this you skip Selecting Traffic Profile tab and you'll go straight to Selecting Broadband Connection Technologies tab.
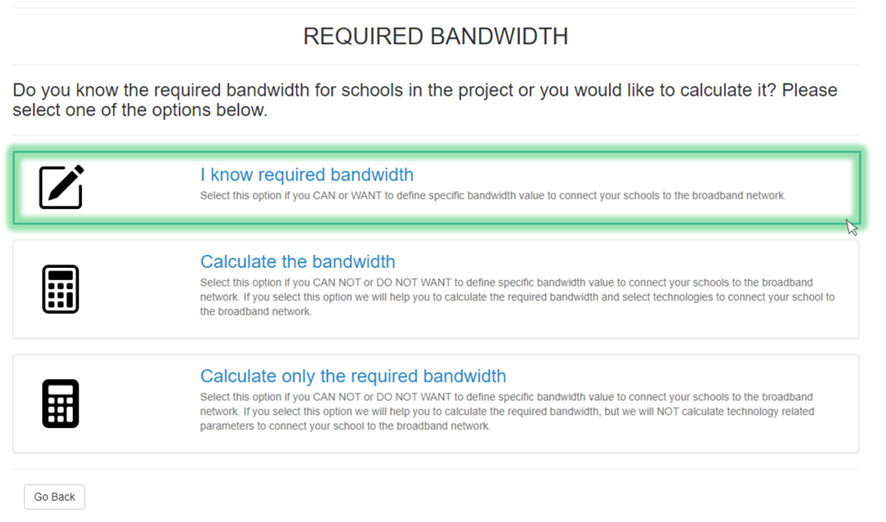
Figure 2. "I know required bandwidth" button
If you need help in bandwidth calculation, select one of two other options. Here you can:
Calculate the required bandwidth and select technologies to connect your school to the broadband network (Figure 3)
Calculate the required bandwidth, but without technology related parameters calculation (Figure 4).
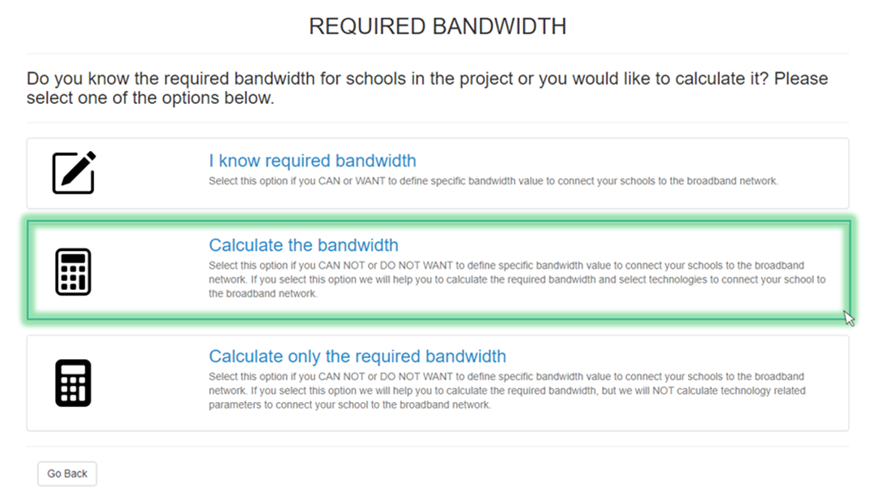
Figure 3. "Calculate the bandwidth" option
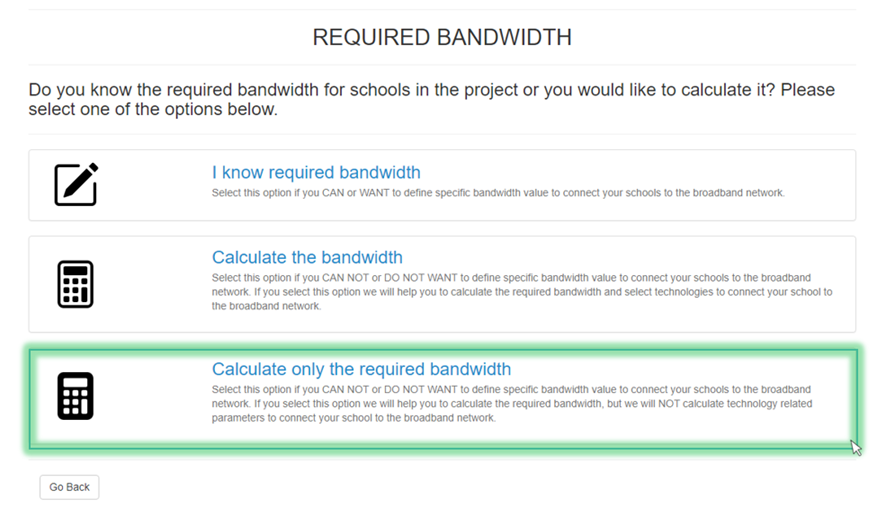
Figure 4. "Calculate only the required bandwidth" option
After that you'll go straight to Selecting Traffic Profile tab.
If you want to change parameters on previous tab, select "Go back" button. After that you'll go back to "Broadband connection" tab (Figure 5).
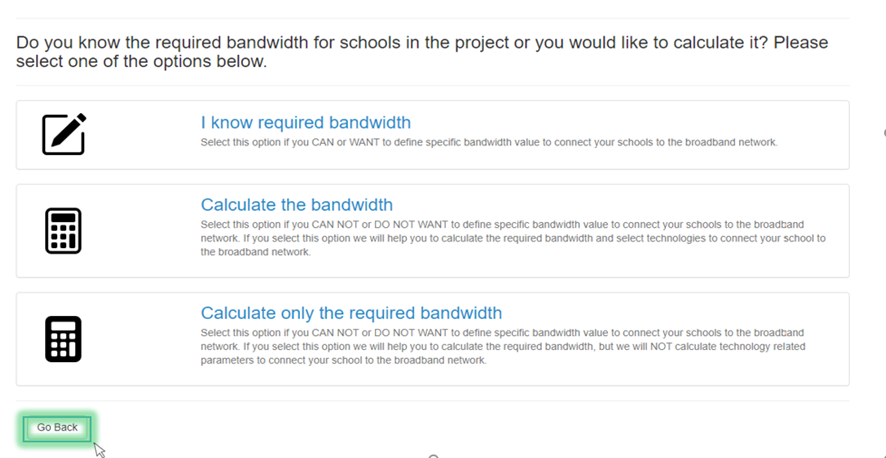
Figure 5. "Go back" button
Selecting Traffic Profile
Traffic profile gives you an option to choose necessary services consumption intensity and quality of services parameters that will be used in your network.
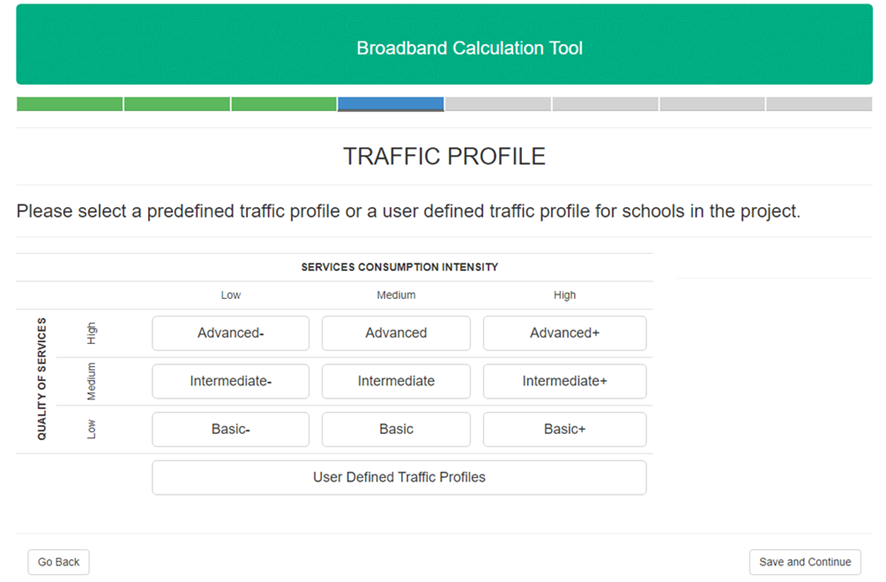
Figure 1. "Traffic Profile” tab
You can combine this two parameters to select the most sutable option among nine offered predefined variants in table (Figure 2).
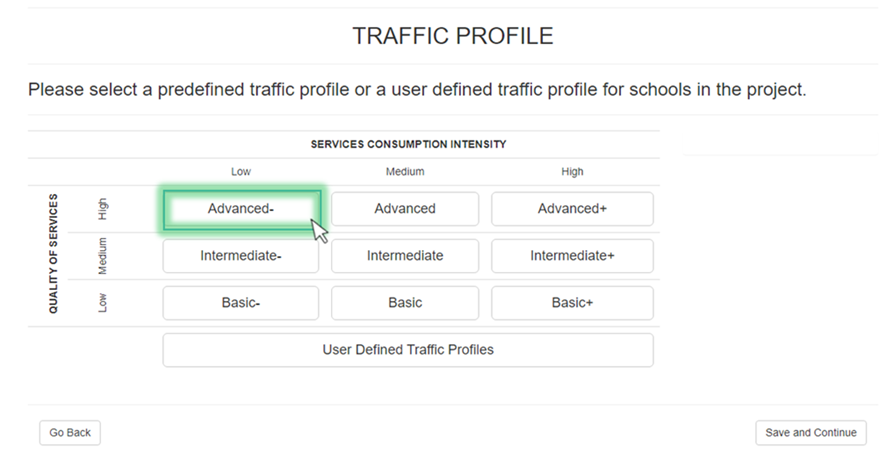
Figure 2. Traffic parameters selection
You can also easily create your own traffic profile. Select the "User Defined Traffic Profiles" option and click on "Add new profile" button.
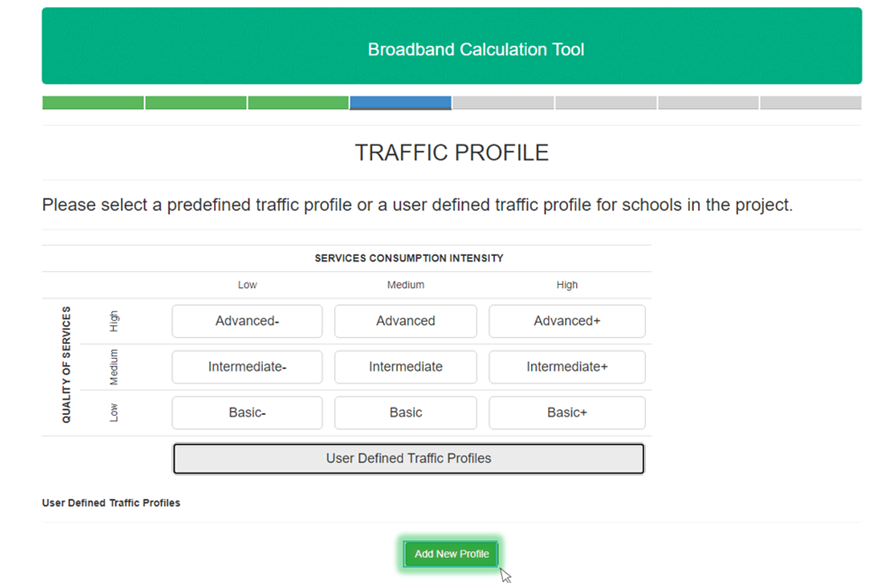
Figure 3. User Defined Traffic Profile
When you click on "Add new profile" button, you'll be redirected to traffic profile generator.
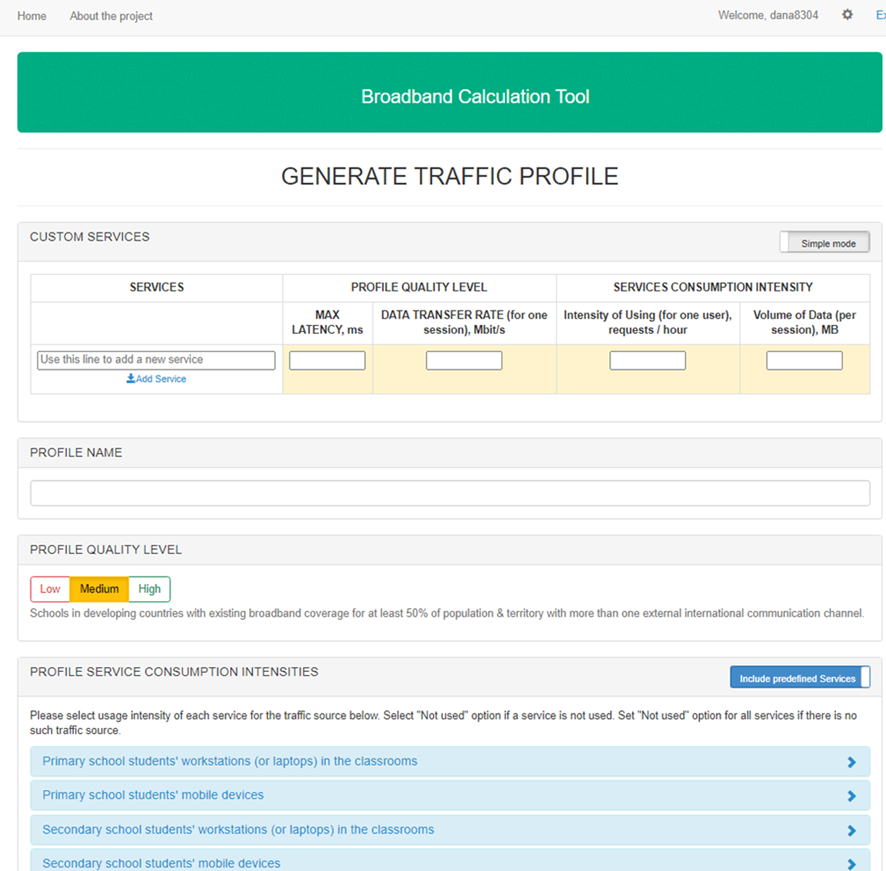
Figure 4. Traffic Profile Generator
There are only two types of fulfilling "Profile Service Consumption Intensities" field: "Customer service" option or "Predefined Services" option. It is important to indicate which option you need. "Predefined Services" option gives more diverse choice of services you use, when "Customer service" only include intensities of customer service device (Figure 5).
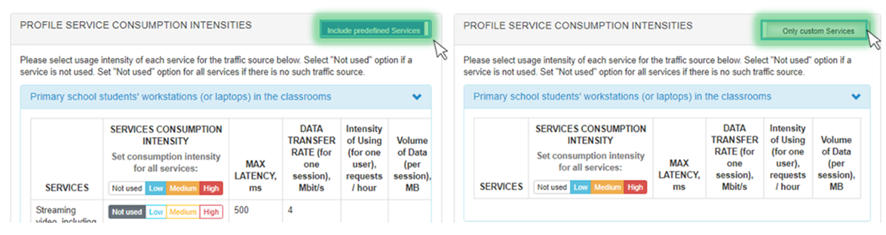
Figure 5. Service consumption intensities options
"Predefined Services" option. Select usage intensity of each service for the traffic source in "Service consumption intensity" field in following table "Predefined Services" option. Select "Not used" option if a service is not used. Set "Not used" option for all services if there is no such traffic source (Figure 6).
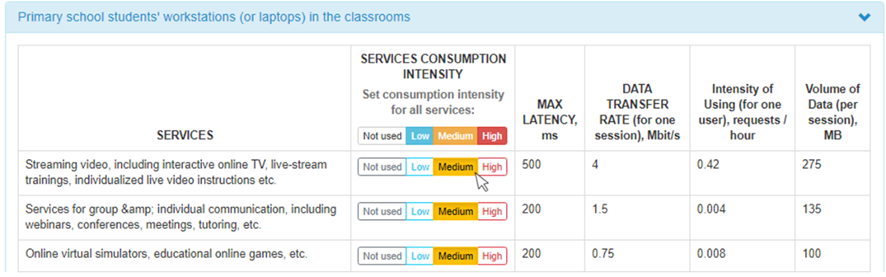
Figure 6. "Predefined Services" option
In "Profile quality level" table select one of three possible options (Figure 7). Here you can choose:
Low. For Schools in hard-to-reach areas (including rural) in the countries where the internal backbone is not developed now and/or the external connectivity to the international communication channels is poor.
Medium. For Schools in developing countries with existing broadband coverage for at least 50% of population & territory with more than one external international communication channel.
High. For Schools in developed countries with good broadband coverage and international communication channels.

Figure 7. "Profile quality level" option
In "profile name" field you write the name of your own "Traffic Profile" parameters. Which will be saved in system under the name you've selected (Figure 8).

Figure 8. "Profile name" field
In "Custom services" table you can add new services that are not included in "Profile Service Consumption Intensities" field including their individual parameters. Also you can do it in "Simple" or "Extended" mode. In "Simple mode" you input average parameters for your service, while in "Extended mode" you can input parameters for different quality levels for each service (Figure 9).
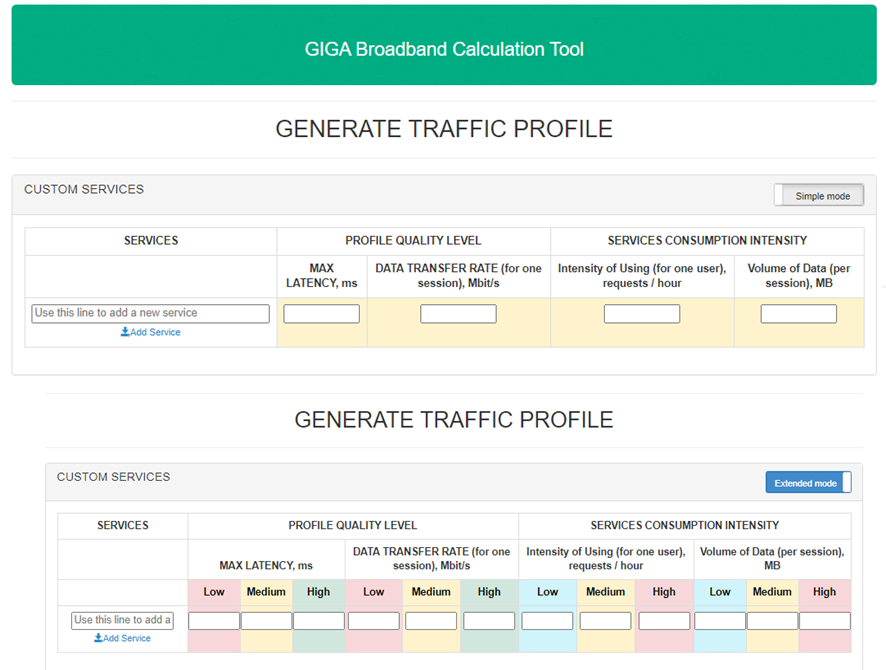
Figure 9. "Custom services" 
Click "Save and Continue" in the bottom of the page to save your parameters. You'll be redirected to "Traffic Profile" page (Figure 10).

Figure 10. "Save and continue" button
Also you can change/delete the formatting of your parameters or add new one in "User defined Traffic profile" settings in "Traffic Profile" tab.
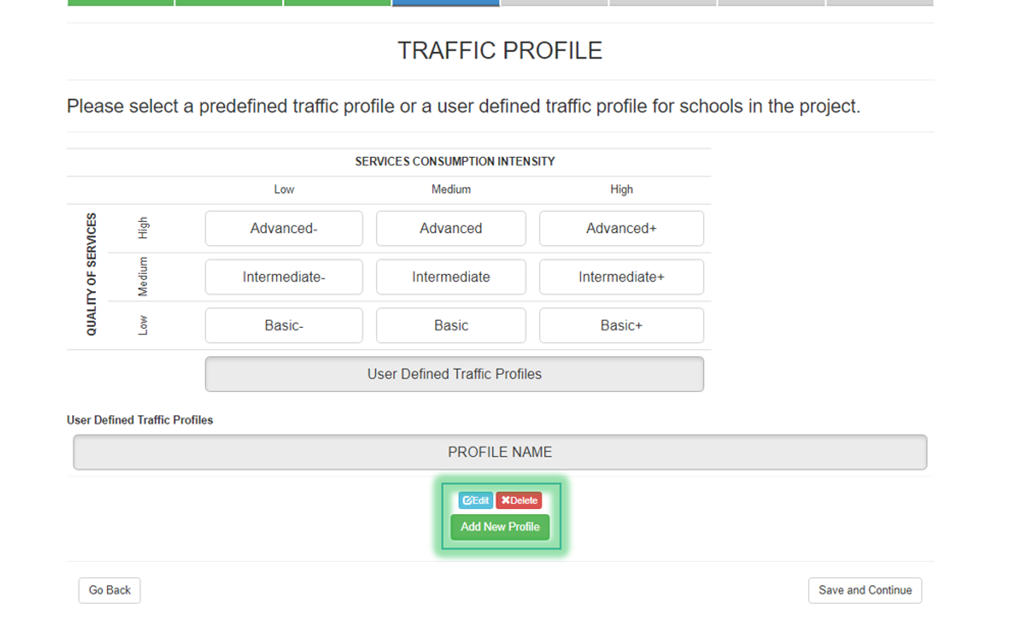
Figure 11. User defined Traffic profile settings
Click "Save and Continue" in the bottom of the page.
Selecting Broadband Connection Technologies
Select technology that could be used for broadband connections between schools. There are 4 types of broadband connections:
Fiber optical cable line - this type of broadband connection usually installed in-ground (often along the roads), in cable duct or overhead via poles;
Mobile cellular network - this type of broadband connection - available only in places with 3G/4G mobile coverage;
Microwave radio link - this type of broadband connection usually requires towers, radio equipment and spectrum licensing;
Satellite communication link - this type of broadband connection available in any place of the world.
Important
Here you should select at least one technology!
Select one or all variants of broadband connection, that will be included in project calculations.
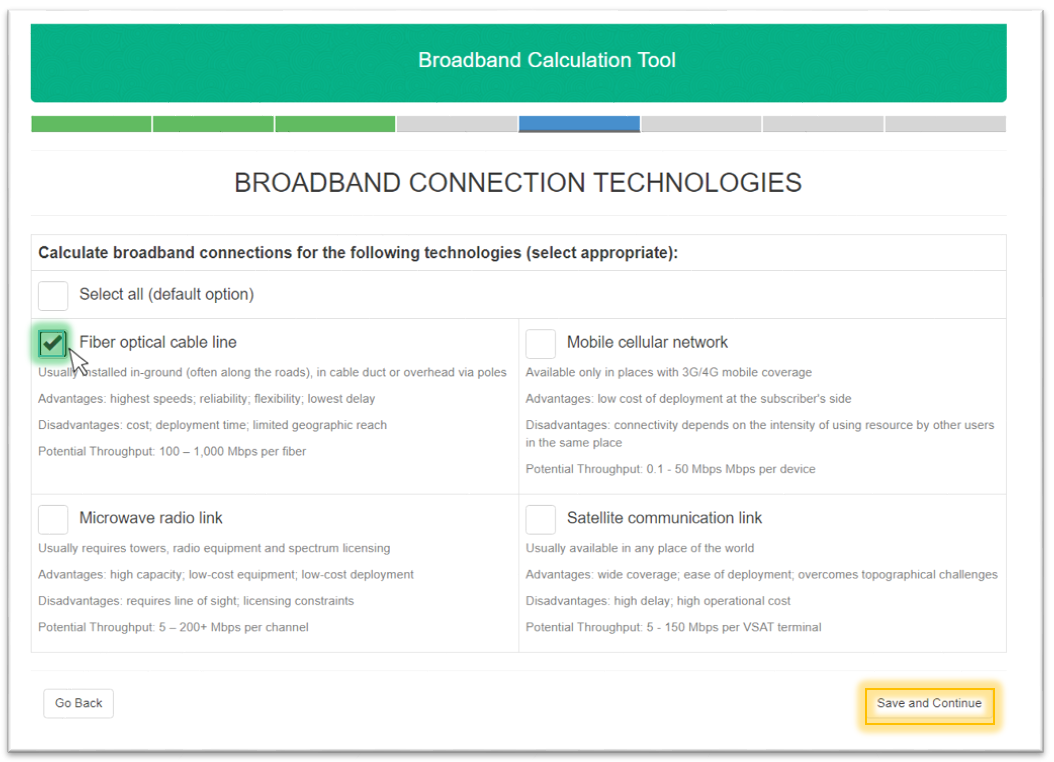
Figure 1. Broadband connection technologies tab
Press "Save and Continue" to proceed.
LAN Calculation
If you want to calculate local area network select "Calculate button" or skip this tab. Choose this step if you want to select suitable local area network configurations and evaluate local area network deployment and operation costs. After that you will be redirected to "LAN configuration". If you skip this tab you'll go to "Calculation settings" tab.
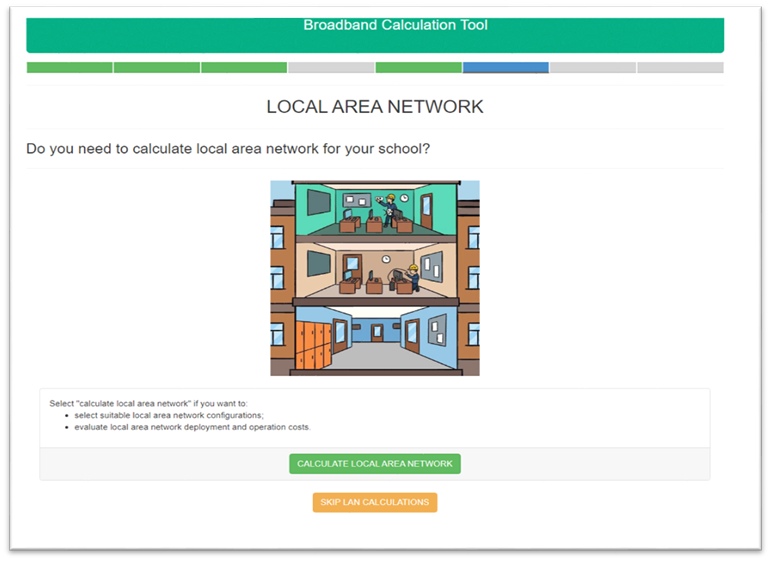
Figure 1. Local area network tab
LAN Configuration
Select local area network segments that you want to calculate for your school. You can choose one or several options from given ones.
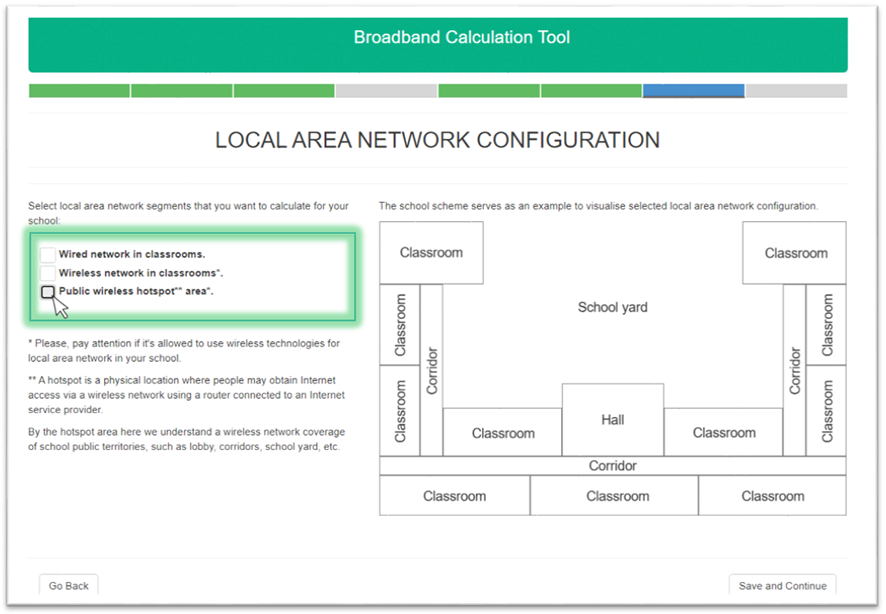
Figure 1. Local area network configuration tab
In the right part of the window you can see the scheme that can help you to visualize selected local area network configuration. It depends on your selection.
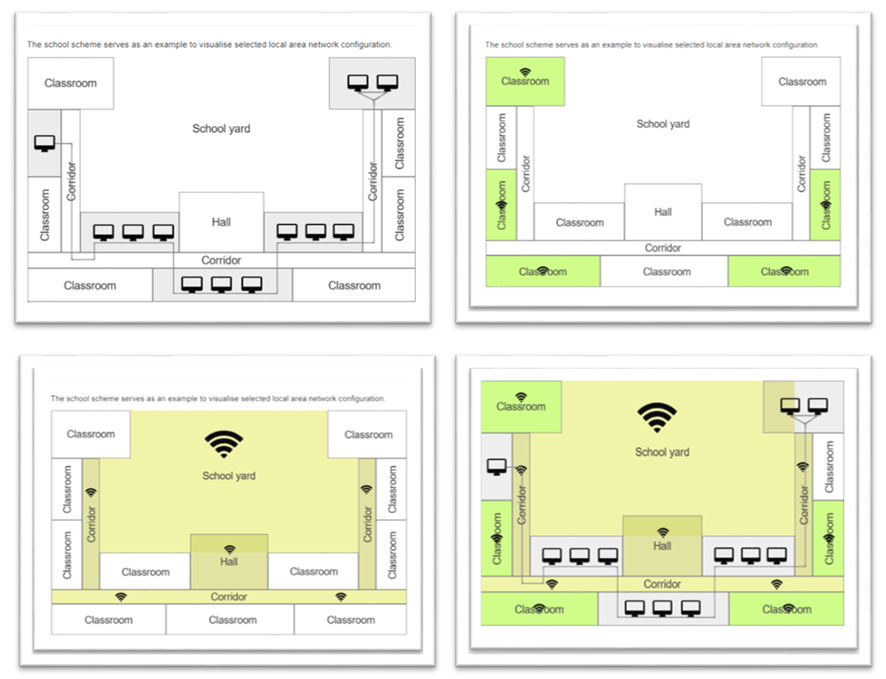
Figure 2. Local area network segments schemes variations
Important
Please, pay attention if it's allowed to use wireless technologies for local area network in your school.
A hotspot is a physical location where people may obtain Internet access via a wireless network using a router connected to an Internet service provider.
By the hotspot area here we understand a wireless network coverage of school public territories, such as lobby, corridors, school yard, etc.
Calculation Settings
In this tab you can check all of the settings calculation settings you've chosen before. In this tab you can check all of the settings calculation settings you've chosen before. These calculation settings for the project can't be changed after submitting and saving
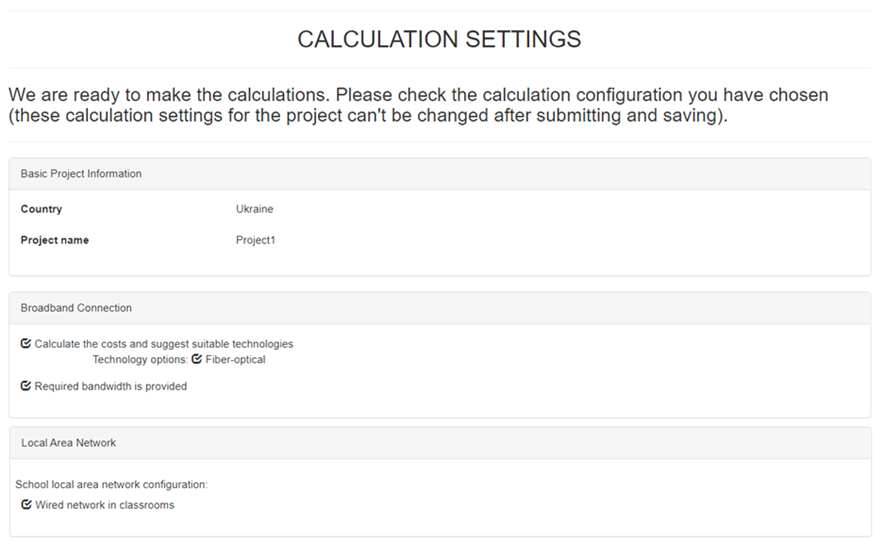
Figure 1. Project Information
Also here you can download templates. This templates should be fulfilled and lately you should upload them to the project (Managing data entry template Managing Data Entry Template), to obtain correct calculations
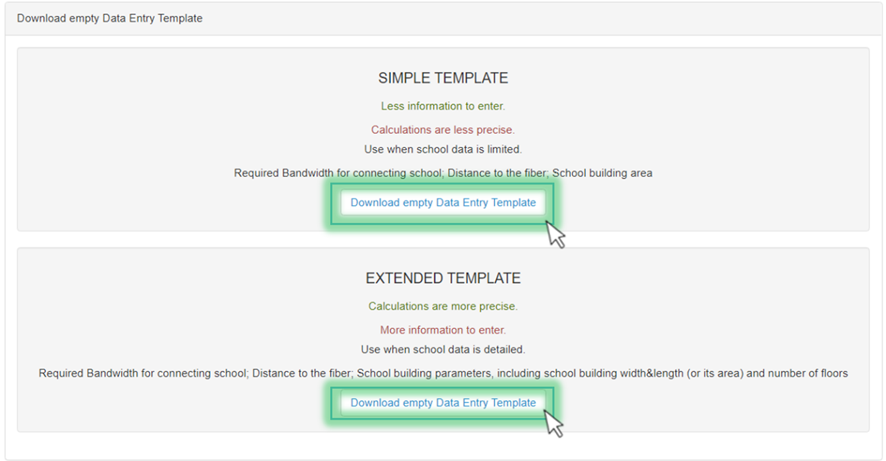
Figure 2. Templates downloading
Press "Save and Continue" to continue. After this you'll see "Home page" with created project (Figure 3). You can see there: project name, project status, description, date of creation and date of modification
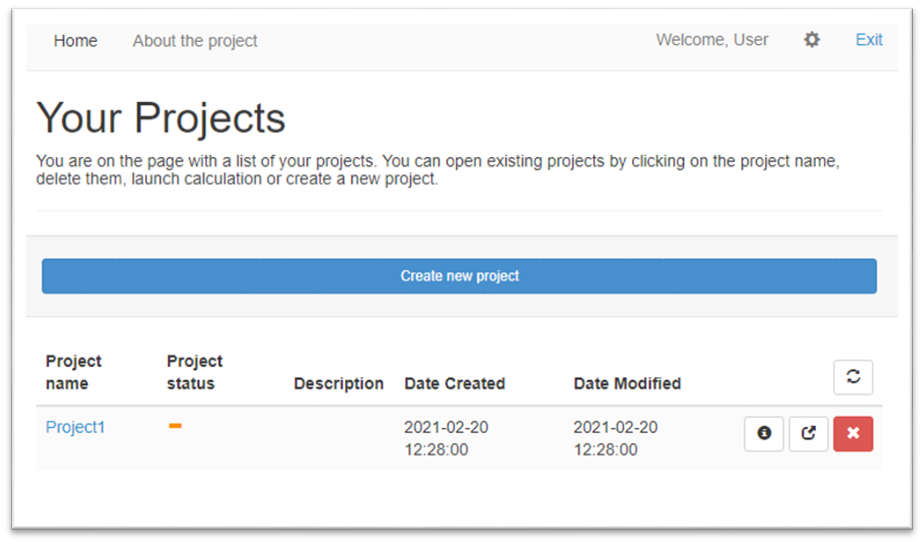
Figure 3. Home page